For an 18 minute video of this procedure, including video of actual surgery, click here.
For a more abbreviated version, click here.
One of the main procedures in treating cervical disc herniations and degenerative (worn out) discs, after failure of non-operative treatment, is the procedure referred to as ACDF, which stands for:
Anterior (done from the front)
Cervical (refers to the neck)
Discectomy (removal of disc, decompression of nerves) and
Fusion (healing process where two or more bones become one)
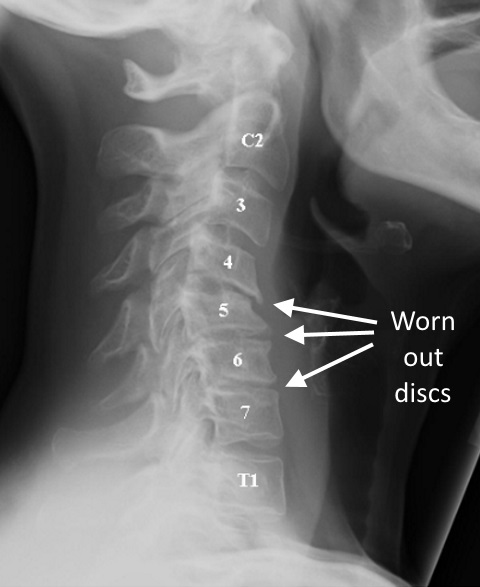
Just like a knee or a hip can wear out, so too can the discs (cushions) between the vertebral bodies.
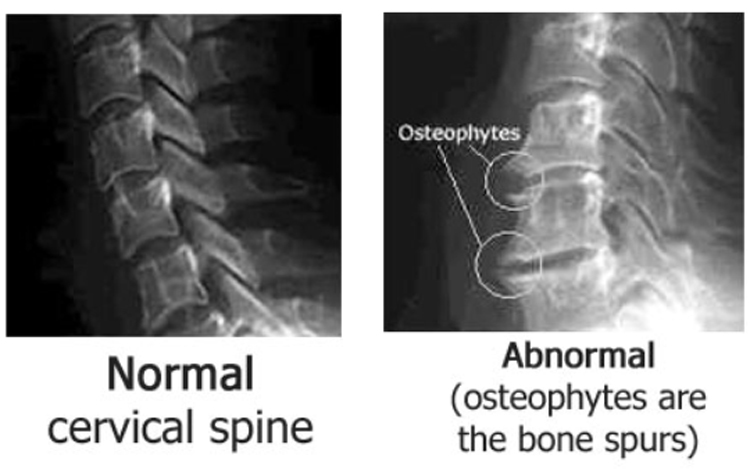
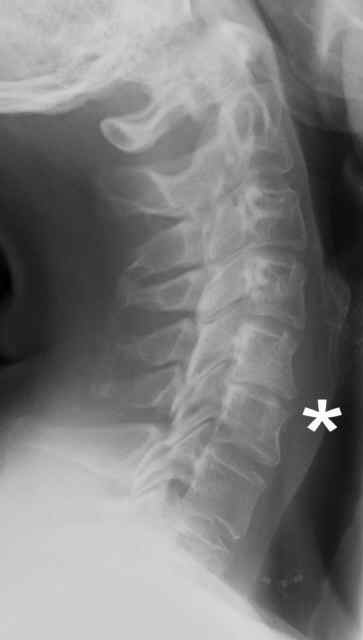
Some of the x-ray signs of wear and tear, seen here, include narrowing of the disc space (think of flat tire) and osteophytes (bone spurs).
Some of the symptoms that patients develop with this wear and tear process are noted below:
Symptoms:
Neck pain
Headaches
Pain between the shoulder blades or above the shoulders (trapezius muscles)
Pain and/or numbness radiating down the arms
Spinal cord compression, which is a more serious condition, can present with loss of balance and coordination, problems walking, loss of bowel or bladder control, and sometimes with out much pain. If you have any of these symptoms, YOU NEED TO BE EVALUATED!
Technical details about ACDF surgery:
Here are some further details for anyone considering this surgery (and much more info is in the 18 minute video that I made, with link on the top of this page):
An incision is made on the front of the neck, usually in a skin crease so as to be not so obvious from a cosmetic standpoint. Usually a transverse incision is made (horizontal) except for four level cases for which a more vertical incision is made.
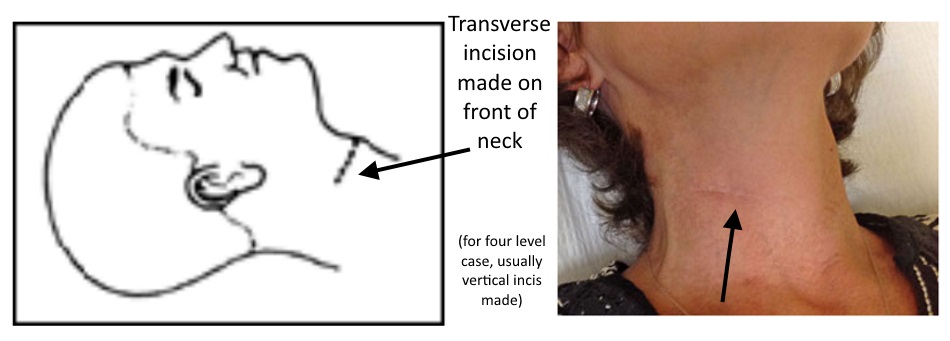
The only structure that is cut is the skin. All the other structures are separated by dissecting between them.
The interval between the muscles of the neck is developed, and the front of the spine is approached by retracting the trachea and esophagus to one side, and the carotid artery to the other. Retractors are put in place to keep the soft tissues out of the way during the procedure. In most cases, the operating microscope is used.
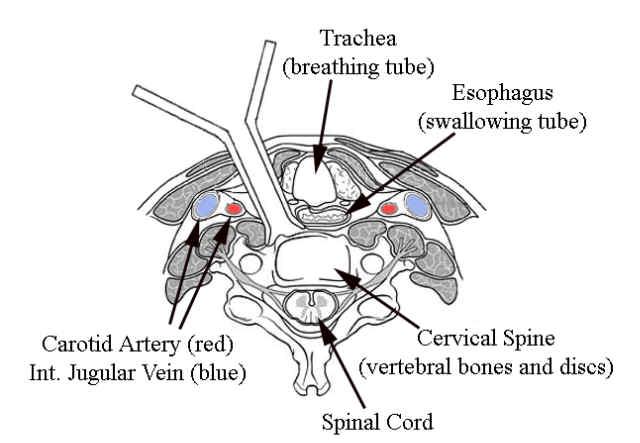
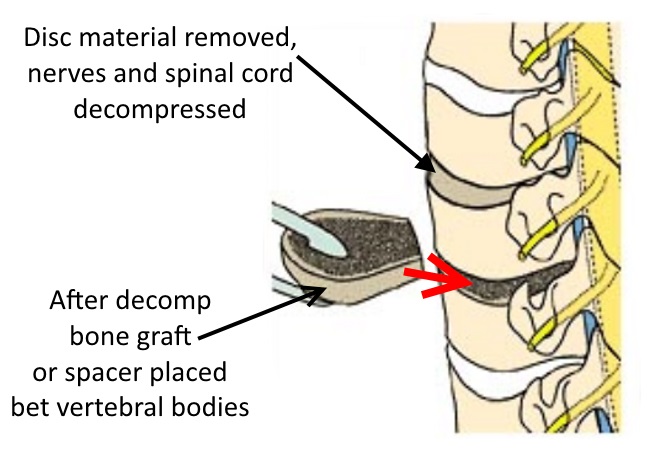
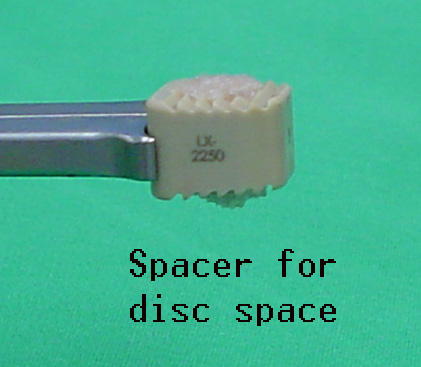
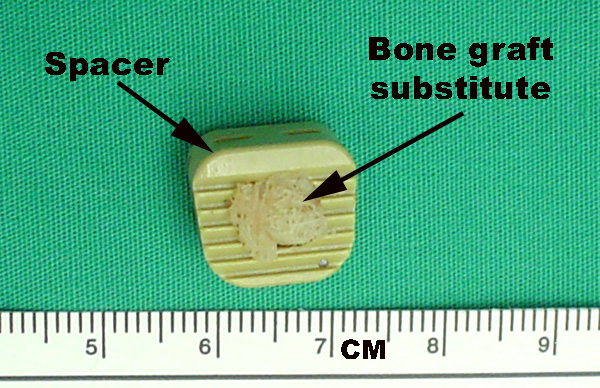
Once the front of the spine is reached and retractors are in place, disc material is removed, the nerve roots and spinal cord are decompressed, and a bone graft, or a spacer with a bone graft substitute, is placed in between the vertebral bodies to help fusion occur, maintain alignment of the spine, and prevent collapse which would narrow the space for the exiting nerve roots.
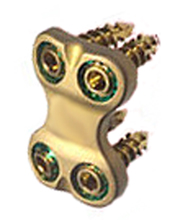
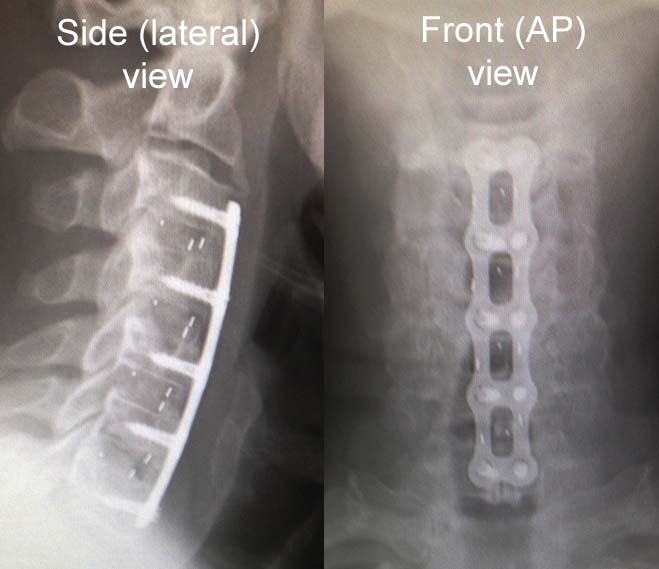
After placing the bone graft, a plate (example shown to left) is applied to the front of the spine to prevent the graft from dislodging, with this process shown briefly in this video.
Here are some illustrative cases:
To the right is an x-ray of the cervical spine of a 50 yr old woman who after a lifting injury had pain in her neck and between her shoulder blades, and also some numbness to the thumb on the right side (C6 nerve root distribution).
The C5-C6 disc, indicated here by an asterisk, is notably more narrow than the disc spaces of the adjacent segments. Her MRI also showed a disc bulge compressing the C6 nerve root.
Since she did not improve with non-surgical treatment (medications, physical therapy, traction), she was taken to surgery for ACDF at C5-6. She had immediate relief of her arm pain in the recovery room. Her pre-operative neck pain was improved, but it took about two months for complete resolution of her neck and shoulder blade pain, as more time is required for the bones to grow together (fusion).
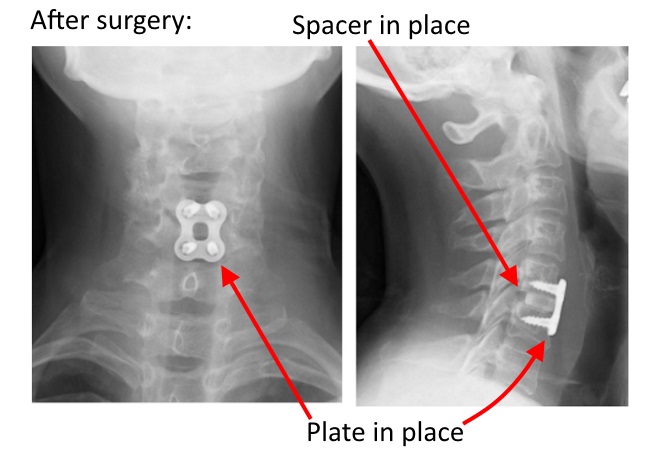
Results after surgery.
Note that the bone spur has been burred away on the deepest part of the part of the disc, the part closest to the spinal cord and nerve roots (behind the bone graft spacer).
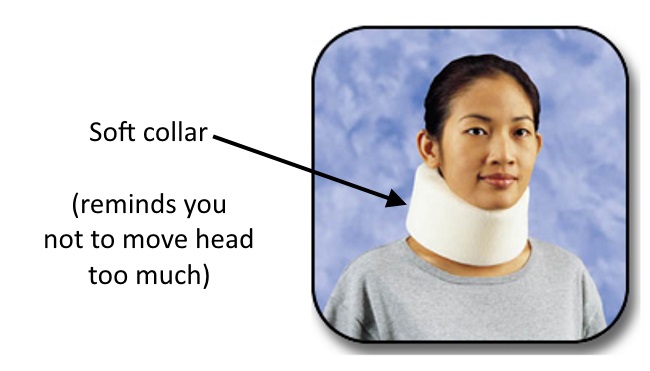
After surgery, you will be advised to wear a soft collar for approximately one month, mainly when you are out of bed.
This collar acts as a reminder not to move your head and neck too much, and also is like a sign on your body saying “Hey, don’t tackle me…I just had neck surgery!” 🙂
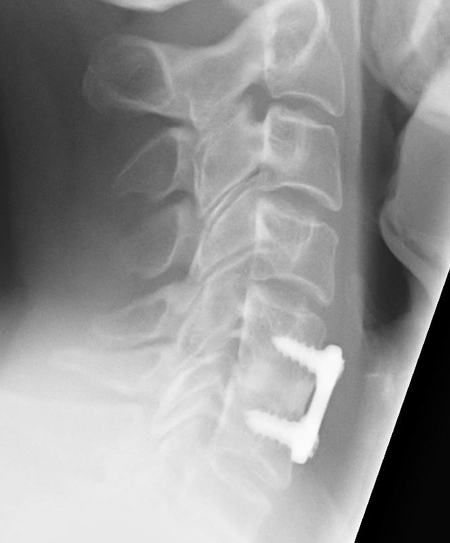
After healing, note that the two bones look like they have melted together into one.
The x-ray on the left shows solid healing of a bone graft used from a piece of cadaver bone.
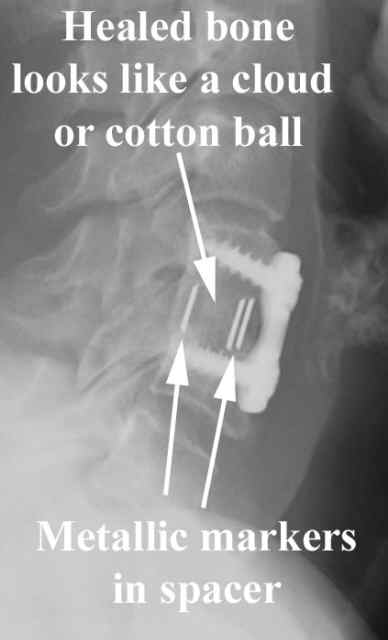
The picture on the right shows healing when the plastic spacer and bone graft substitute are used, with the bridging bone that forms in the spacer looking like a cloud or cotton ball forming between the vertebral bodies above or below. The spacer is invisible on x-ray, so the metallic markers are embedded in the plastic so we can know its position
Once a fusion heals, however, the mechanics of the neck will be changed, since the adjacent levels will have a little more stress on them for motions of the neck. Just like if you had a fusion of your ankle (so the bones were stuck together and didn't move), there would be more stress on your knee.
As you will note in the video below, without a fusion, all the vertebral bodies stay in line between flexion and extension. However, in the level above the fusion, when the neck bends forward, the level above moves forward slightly. Fortunately, in most cases, many years pass before the next level(s) wear out, but these next levels have some additional stress being next to fused segments.
Often, more than one level requires treatment.
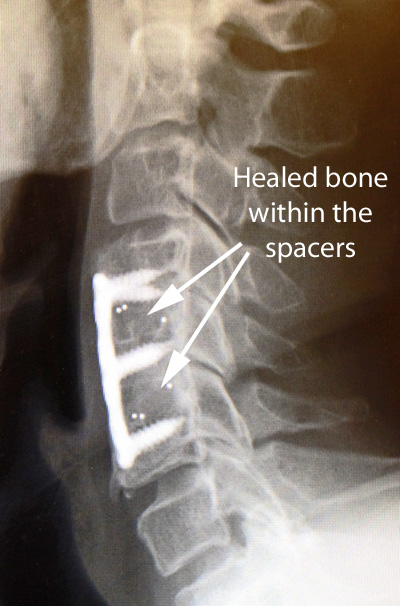
In this x-ray which shows a two level fusion, the healed bone looks like a cloud in between the vertebral bodies.
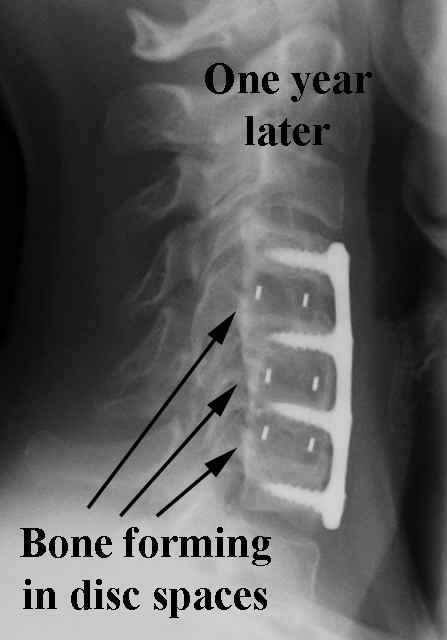
Three level example:
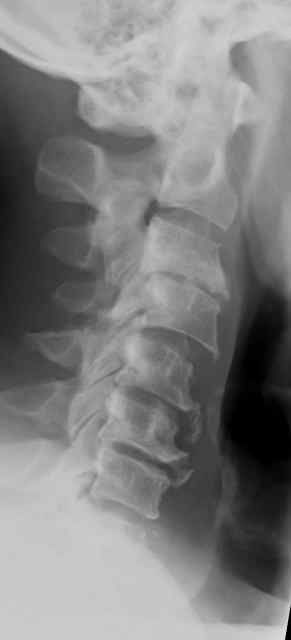
This patient had degeneration reversing the normal curve of her spine (should be curved hollow to the back, not to the front).
Pre op x-ray to left.
Post op to right.
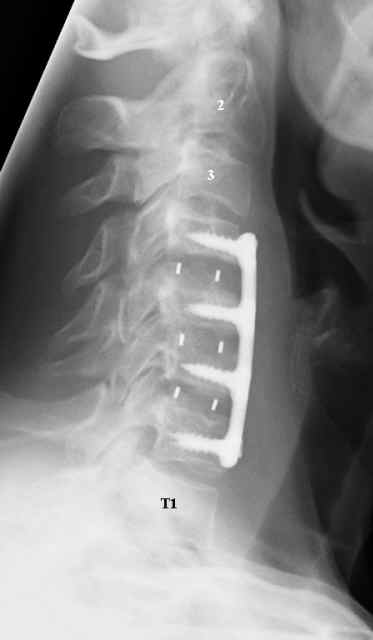
At one year after surgery, the bone which has formed in the disc spaces looks white, and is consistent with fusion. Also, there is no evidence of screw loosening (see below).
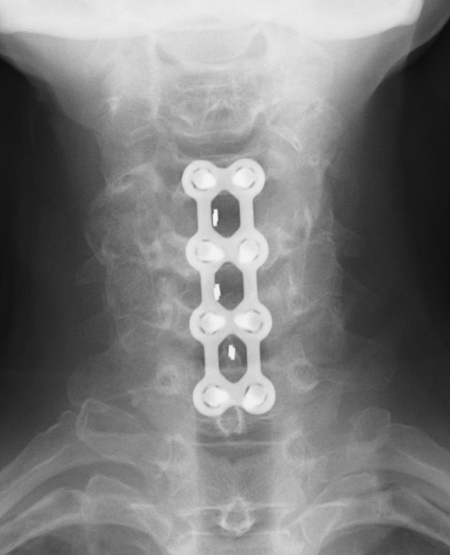
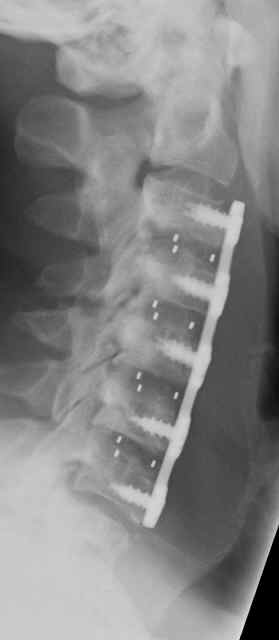
Occasionally, a four level fusion is required.
This patient had spinal cord compression at four levels.
Sometimes, a multiple level case will require a second surgery to also fuse from behind as well since there is a not insignificant chance that one of the four levels will potentially not fuse.
Another four level case.
One of the risks: Nonunion
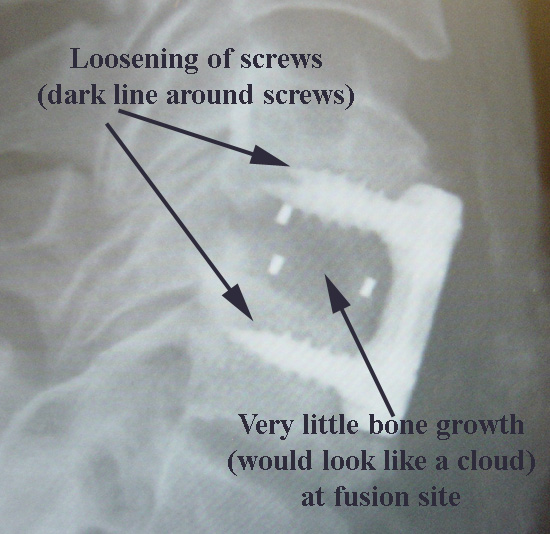
However, while the chance of success for cervical fusions is very high, not every fusion attempt actually fuses. A non fusion is called a nonunion.
In this patient, who is a smoker (take note, smokers!), 11 months after his initial operation, there is evidence of screw loosening on his X-ray. Click here for other risks of smoking.
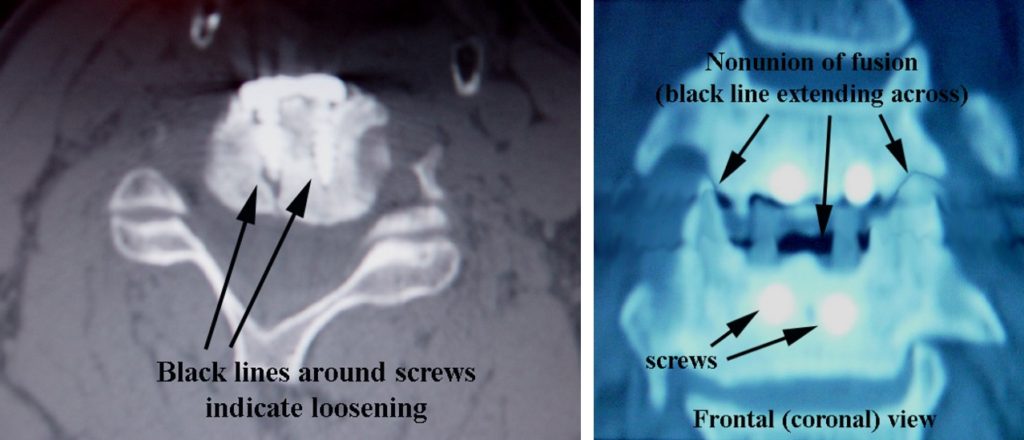
Other findings are noted on CT scan, which is a cross sectional way to image the spine, which shows loosening of the screws on the left, and on the right shows absence of bone forming in the spacer.
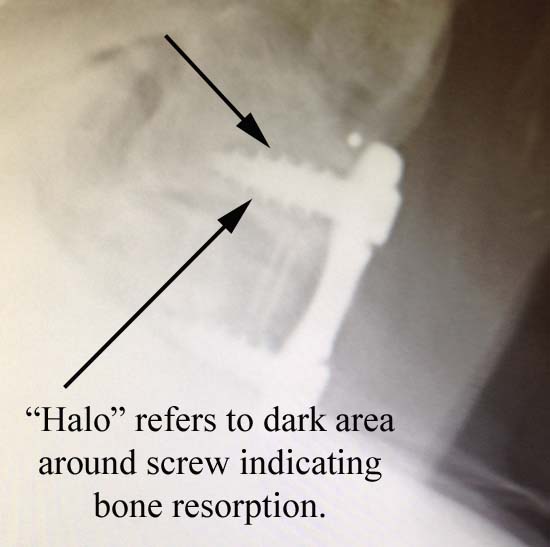
Here is another example of the x-ray appearance of screw loosening described as a “halo” or dark line around the screws. As the screw loses its purchase on the bone, the lack of bone around the screw threads, without the calcium that is seen on x-rays, looks dark.
Think of putting a screw into a soft material like an ice cream cone: With stress on the screw, it wouldn't take long for the screw threads to have no bite on the material being secured. This lack of bite is illustrated as the halo seen on x-ray.
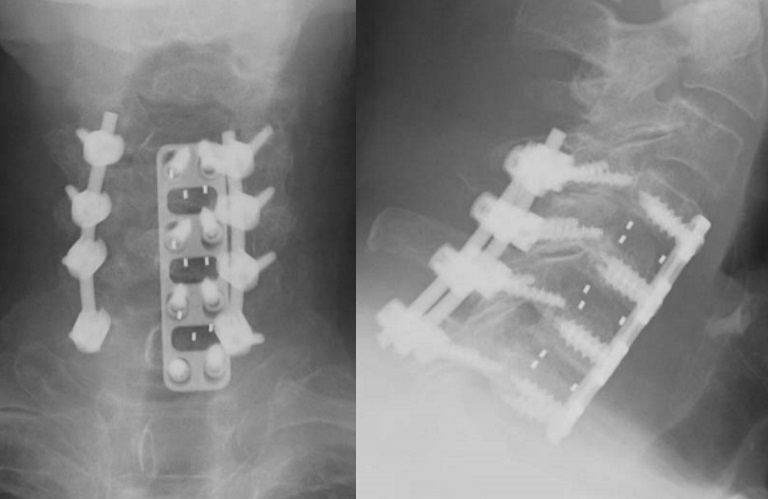
The salvage for this case was to fuse the non-fused segment from behind with screws in the lateral masses, the back part of the spine. This patient went on to fusion in the front of the spine after this second surgery.
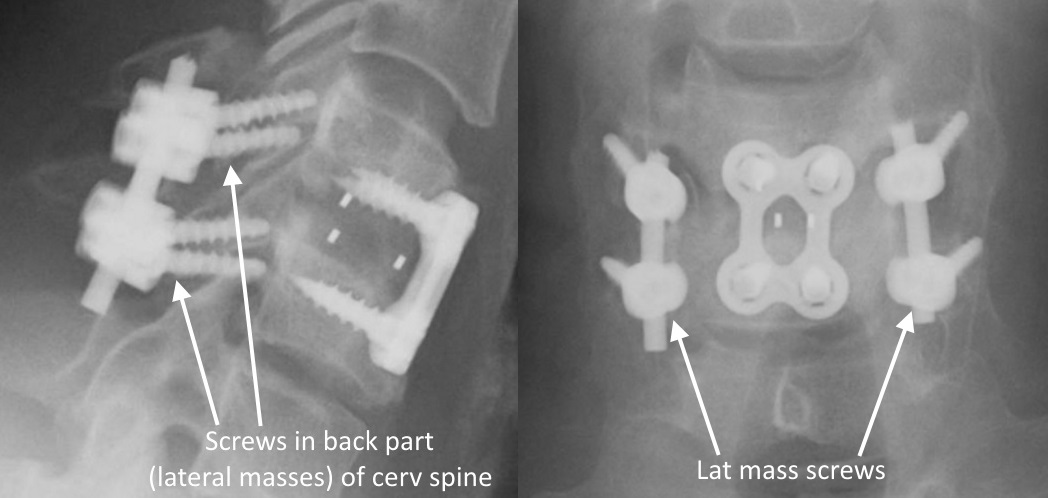
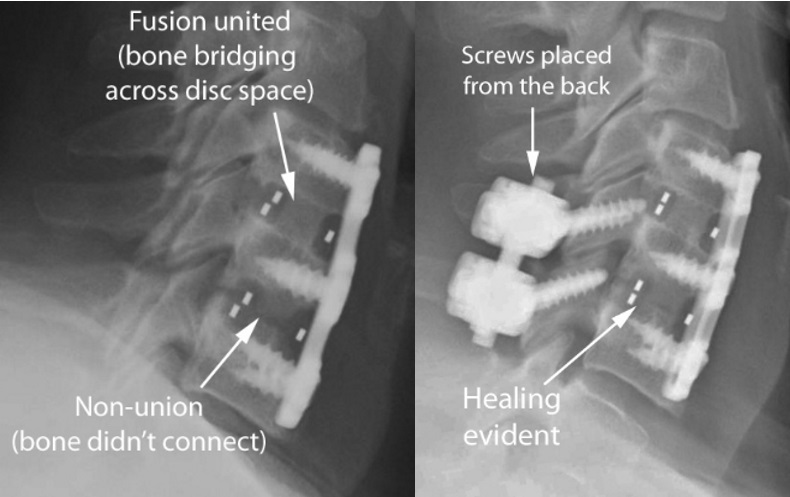
In this case, the lower of the two fusion levels (image on the far left) didn’t fuse.
After placing the screws from behind, the fusion in the front between the vertebral bodies showed evidence of healing (image on near left), and the patient’s symptoms resolved.
Here is a case where a plate pulled out.
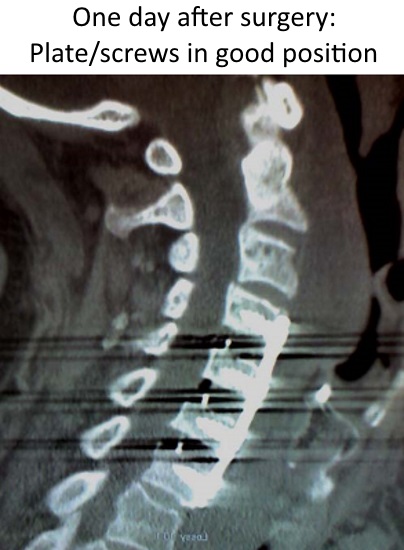
The patient, who is an 84 year old female (doesn't have the strongest bone quality), had an uneventful three level spinal cord decompression and fusion. On the first day in the hospital, she thought her neck felt swollen, so a CT scan was done to look for a hematoma, or blood collection. No hematoma was found, but on this reconstruction view, the plate and screws can be seen to be properly in place, in the correct place against the front of the vertebral bodies.
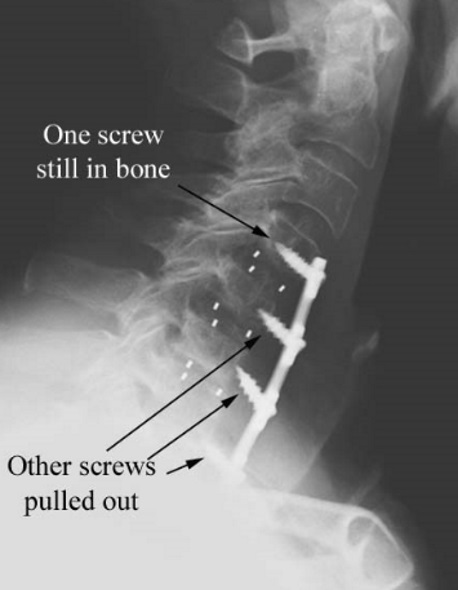
However, at home since the patient felt so much better, she resumed what she thought were normal activities. Despite a recommendation for a five pound weight lifting limit, she wound up lifting some gallon jugs of milk. Although she had no symptoms, she was noted on x-ray two weeks later at her follow up visit to have inadvertently pulled out her plate as noted on this x-ray.
The patient was taken back to surgery where another, slightly shorter plate was replaced on the front, and the fusion was additionally stabilized with lateral mass screws in the back part (posterior) of the spine. As of the most recent visit with this patient, she healed and was doing well.
However, point is, the only guarantee with surgery...is that there is no guarantee.
